
Spectrum of signal delivered to soundcard
The program xsndtest (version .17) designed for testing and finding the optimum settings for your sound card. Unfortunately it at present works automatically with the oss (emulation) /dev/dsp sound card port, and will only test at 16 bits resolution-- it can be used to test 24 bit card performance and alsa drivers as well with slightly more work. See the section Alsa below.
The program works in its simplest form by playing out the output port of the sound card, while at the same time recording the same signal through the input port of the card. Thus the card needs to be capable of full duplex (record and play) operation for this simplest procedure to work. However, it can also be used just as the source for the desired test signal to be delivered out the output port to another system, or as the recorder of such a signal from another computer or sound source.
The program generates a waveform which consists of 100 frequencies
spread
across the spectrum from 16Hz to 16KHz, with ten equally spaced pitches equal in each octave
and with equal amplitude. (the lowest frequency and the number of
octaves covered by the test signal can be adjusted.)
This sound is played for two seconds out the /dev/dsp sound port (The oss driver under Linux) , and recorded at the same time through the same device. The resultant recorded sound is analysed for the 1 second period from .75 sec to 1.75 sec (This is to eliminate any "startup" noise in the recording)
The recorded sound is analysed, both to see if the soundcard has preserved the amplitudes of these frequencies, and to see if it has introduced any extra sounds (noise or distortion). This is a relatively severe test of the card, much more severe that the usual harmonic and IM distortion tests, but also comes closer to the structure of real music, and the distortions and noise introduced by the card into real music.
The key limitation is that the system must operate in loopback configuration, so that it tests a combination of the output DAC and amplifier and the input ADC and amplifier combined. Thus a great output could be hidden behind a poor performance of the recording section of the card.
Of course if you have two cards, one of which is fantastic, it can be used as the source of the signal, to test the input behaviour of the card under test, and as the test of the output of the card under test.
Many sound cards seem to direct the input coming into either Line In or
Microphone directly back into the output.
This will cause feedback in this test. On the two cards I have tested,
this can be eliminated by an appropriate setting of the mixer controls
(eg in aumix or alsamixer). If you are using the Line input, choose the
Line as the input (ie red dot) in aumix, but pull the Line slider all
the way to zero. This slider seems to control only the sound level
delivered directly from the input to the output, and not the sound level
delivered to the /dev/dsp input. Control
the input volume to /dev/dsp with the IGain slider.
You can get an idea both the input and output of the sound card by watching
what
happens to the noise figures as the amplitude sliders (eg using
aumix)
are adjusted. Pull down the output slider (ie the PCM slider) to
about the
half way mark. Adjust the input IGain slider to find the lowest value of the
total
distortion. Now turn up the output (PGM) until the distortion suddenly
rises. (Make sure that the Max value of the signal never reaches 1 or
-1-- the signal level slider will turn red. Pull down
the IGain if necessary to keep it below clipping).
This value of PGM is the clipping level of the output. Do not ever have it higher
than
that level.
Now, with the output (PCM) below that clipping level, turn up the
input (IGain)
until again the distortion begins to rise significantly (again making sure that Max
is less than 1.0-- decrease the PCM slider if necessary) . Again, you should never
have the
input higher than this.
 Freq slider--This determines the lowest frequency of the signal
sent to the card. This is one of the discrete values corresponding to
the 100 discrete frequencies produced (ie 10 equally spaced pitches per
octave, and 10 octaves). If this is adjusted the octave slider is always
also adjusted to ensure that the top frequency never exceeds 20KHz.
Freq slider--This determines the lowest frequency of the signal
sent to the card. This is one of the discrete values corresponding to
the 100 discrete frequencies produced (ie 10 equally spaced pitches per
octave, and 10 octaves). If this is adjusted the octave slider is always
also adjusted to ensure that the top frequency never exceeds 20KHz.
 Octave slider--This slider determines the number of octaves (1-10)
of pitches covered by the test tones. This is always a whole number and
is always adjusted to that the maximum frequency never exceeds 20KHz.
Octave slider--This slider determines the number of octaves (1-10)
of pitches covered by the test tones. This is always a whole number and
is always adjusted to that the maximum frequency never exceeds 20KHz.
For most purposes these two sliders can simply be left in their default position.
The analysis proceeds by the program taking 1 second worth of material and performing a Fourier analysis of that material. At each of the frequencies as determined by the Initial Freq and the Octaves sliders (ie 100 frequencies by default) the power in the recorded signal is determined and plotted in the top graph on the right. The power at the other frequencies, which is a combination of the noise and distortion is plotted for the right and left channels on the lower two graphs on the right.
 Record from file-- This button determines whether or not the program
records and analyses the sound from the soundcard or the sound stored in
a file. The file is assumed to be a raw stereo file, with the speed and
the bits per sample as determined by the selectors described below. (The
24L and 24H selectors are assumed to be 24 bit samples packed into 32
bits, with either the bits packed into the lower or higher bytes of the
32 bits. The highest or lowest byte is assumed to be zero.
Record from file-- This button determines whether or not the program
records and analyses the sound from the soundcard or the sound stored in
a file. The file is assumed to be a raw stereo file, with the speed and
the bits per sample as determined by the selectors described below. (The
24L and 24H selectors are assumed to be 24 bit samples packed into 32
bits, with either the bits packed into the lower or higher bytes of the
32 bits. The highest or lowest byte is assumed to be zero.
The name of the file must be typed into the input region. If the file is longer than 2 sec of data, the slider below the file name input region can be used to select from which part of the file the 1 sec sample will be taken.
Note that when this option is selected, the Play option is canceled, since it makes no sense to play through the soundcard while reading and analysing from a file.
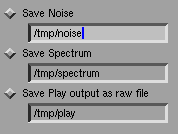
 Dump Recorded Sound.-- Two seconds of the recorded input is dumped,
as a raw file at the speed and bits format selected, to the file
/tmp/record. This could be done to save some particular piece of unusual
analysed result. This must be pressed after the Start button is pressed
with a sample in memory to be saved. It is rarely of much use.
Dump Recorded Sound.-- Two seconds of the recorded input is dumped,
as a raw file at the speed and bits format selected, to the file
/tmp/record. This could be done to save some particular piece of unusual
analysed result. This must be pressed after the Start button is pressed
with a sample in memory to be saved. It is rarely of much use.
 Output Amplitude-- This changes the amplitude of the signal created
for sending to the soundcard. Usually the signal is the maximum possible
value, so that one of the samples has a value of 2^15 or 2^23 depending
on the bits selected. Sliding these sliders to the left reduces this
maximum value. Note that this is not the same as a volume control as the
digitisation level changes when this slider is used. Eg, if these are
slid to the halfway point, then only 15 bits would be used in the
digitized signal rather than all 16, increasing the digitization noise
in the output.
Output Amplitude-- This changes the amplitude of the signal created
for sending to the soundcard. Usually the signal is the maximum possible
value, so that one of the samples has a value of 2^15 or 2^23 depending
on the bits selected. Sliding these sliders to the left reduces this
maximum value. Note that this is not the same as a volume control as the
digitisation level changes when this slider is used. Eg, if these are
slid to the halfway point, then only 15 bits would be used in the
digitized signal rather than all 16, increasing the digitization noise
in the output.

 LR button--This determines
whether the y axis limits are determined by the left or right channel.
LR button--This determines
whether the y axis limits are determined by the left or right channel.

These files each represent 16 seconds of sound output. Choose the file which corresponds to your soundcard's abilities or the property you want to test. Now use aplay and arecord, the alsa utilities to play and record the files. Run a connection from the output to the input of your soundcard. Set up your mixer output ( alsamixer, or amixer) to allow it to both play and record and then play the file and record it at the same time. For example, lets say you want to test your card at 44100Hz 16 bit (or 48000Hz, 16 bit) Do
aplay -f cd -t raw output-16-44100.raw&
( or aplay -f dat -t raw output-16-48000.raw)
Then during the 32 seconds that that playing is going on, also run
arecord -f cd -t raw -d 4 /tmp/input-16-44100.raw
(or arecord -f dat -t raw -d 4 input-16-48000.raw)
These will record 4 seconds worth of the sound being piped out the output and into the input which you can then analyse with xsndtest. Just select 16 bits, speed=44100 ( or speed of 48000 for the -f dat case) and use the "record from file" feature, where you select the filename to be /tmp/input-16-44100.raw (or whatever you named it). You can use the small slider under the filename to select the portion of the file you want to analyse. The program will now analyse one second's worth of the sound in the file for you.
 . This document may
be reproduced as long as the author's name is not removed, and as long as any
changes to the document are clearly marked as such and are sent to the author.
. This document may
be reproduced as long as the author's name is not removed, and as long as any
changes to the document are clearly marked as such and are sent to the author.